iOS App Pentesting the Hard Way (On Physical Device)
For those creating an environment to test iOS mobile app security with a physical device, this is your kick-starter guide. Pentesters, developers, and fanatics - welcome.
Please read the Legal / Ethical Disclosure at the end of this page*
Summary
Setting up a physical testing environment for iOS mobile apps requires a particular coordination of technologies. We’ll be going through 3 main steps:
Jailbreak the iOS device (the fundamentals)
Sideload the IPA (iOS app bundle)
Capture web traffic with a forward proxy
Preparation
It’s best to design the environment around the iOS app since it’s configurations will narrow down the iOS devices you can use.
iOS Versions 17 and above
As of this writing, iOS 16 and below are most practical to jailbreak; iOS 17 is a steep challenge; anything above iOS 17 doesn’t have a publicly known jailbreak. If your target application doesn’t support an iOS version 17 or below (and don’t intend to for testing), consider using an emulated testing environment over using a physical device. For the same reason, consider making your application’s minimum iOS support 17 or above.
Your Toolbox
iOS device - Likely an iPhone or iPad. As mentioned, first determine the app’s minimum supported iOS version and the requirements to jailbreak the device of interest. Do this BEFORE purchasing and driving to your Facebook Marketplace seller’s location.
macOS Device - Many jailbreaks require a macOS device, and the app signing process we’ll use includes Xcode.
Cable - To connect the iOS device to the PC. Check what your devices support, what your jailbreak method requires, and make sure the cable supports data communication.
Burp Suite Pro - We’ll be using this as our forward proxy tool. PortSwigger also provides a free PortSwigger Community Edition with less functionality, but suitable for a limited setup.
Apple Developer Account - An annual subscription through your Apple ID. We’ll use this to sign the target app for our device to trust it. There are methods to spoofing the signing process that we won’t go through here. For non-stealthy and time-efficient purposes, we’ll pay for simplicity.
1 ) Jailbreak the iOS Device
Repeating — before selecting your to-be jailbroken iOS, a few considerations:
1.1) Minimum required iOS version
The iOS must have an iOS version lower than the app’s minimum requirement (in capacitor.config.json in the IPA app bundle). Also helpful: the earlier the iOS version, the easier the jailbreak process tends to be.
1.2) Jailbreak method
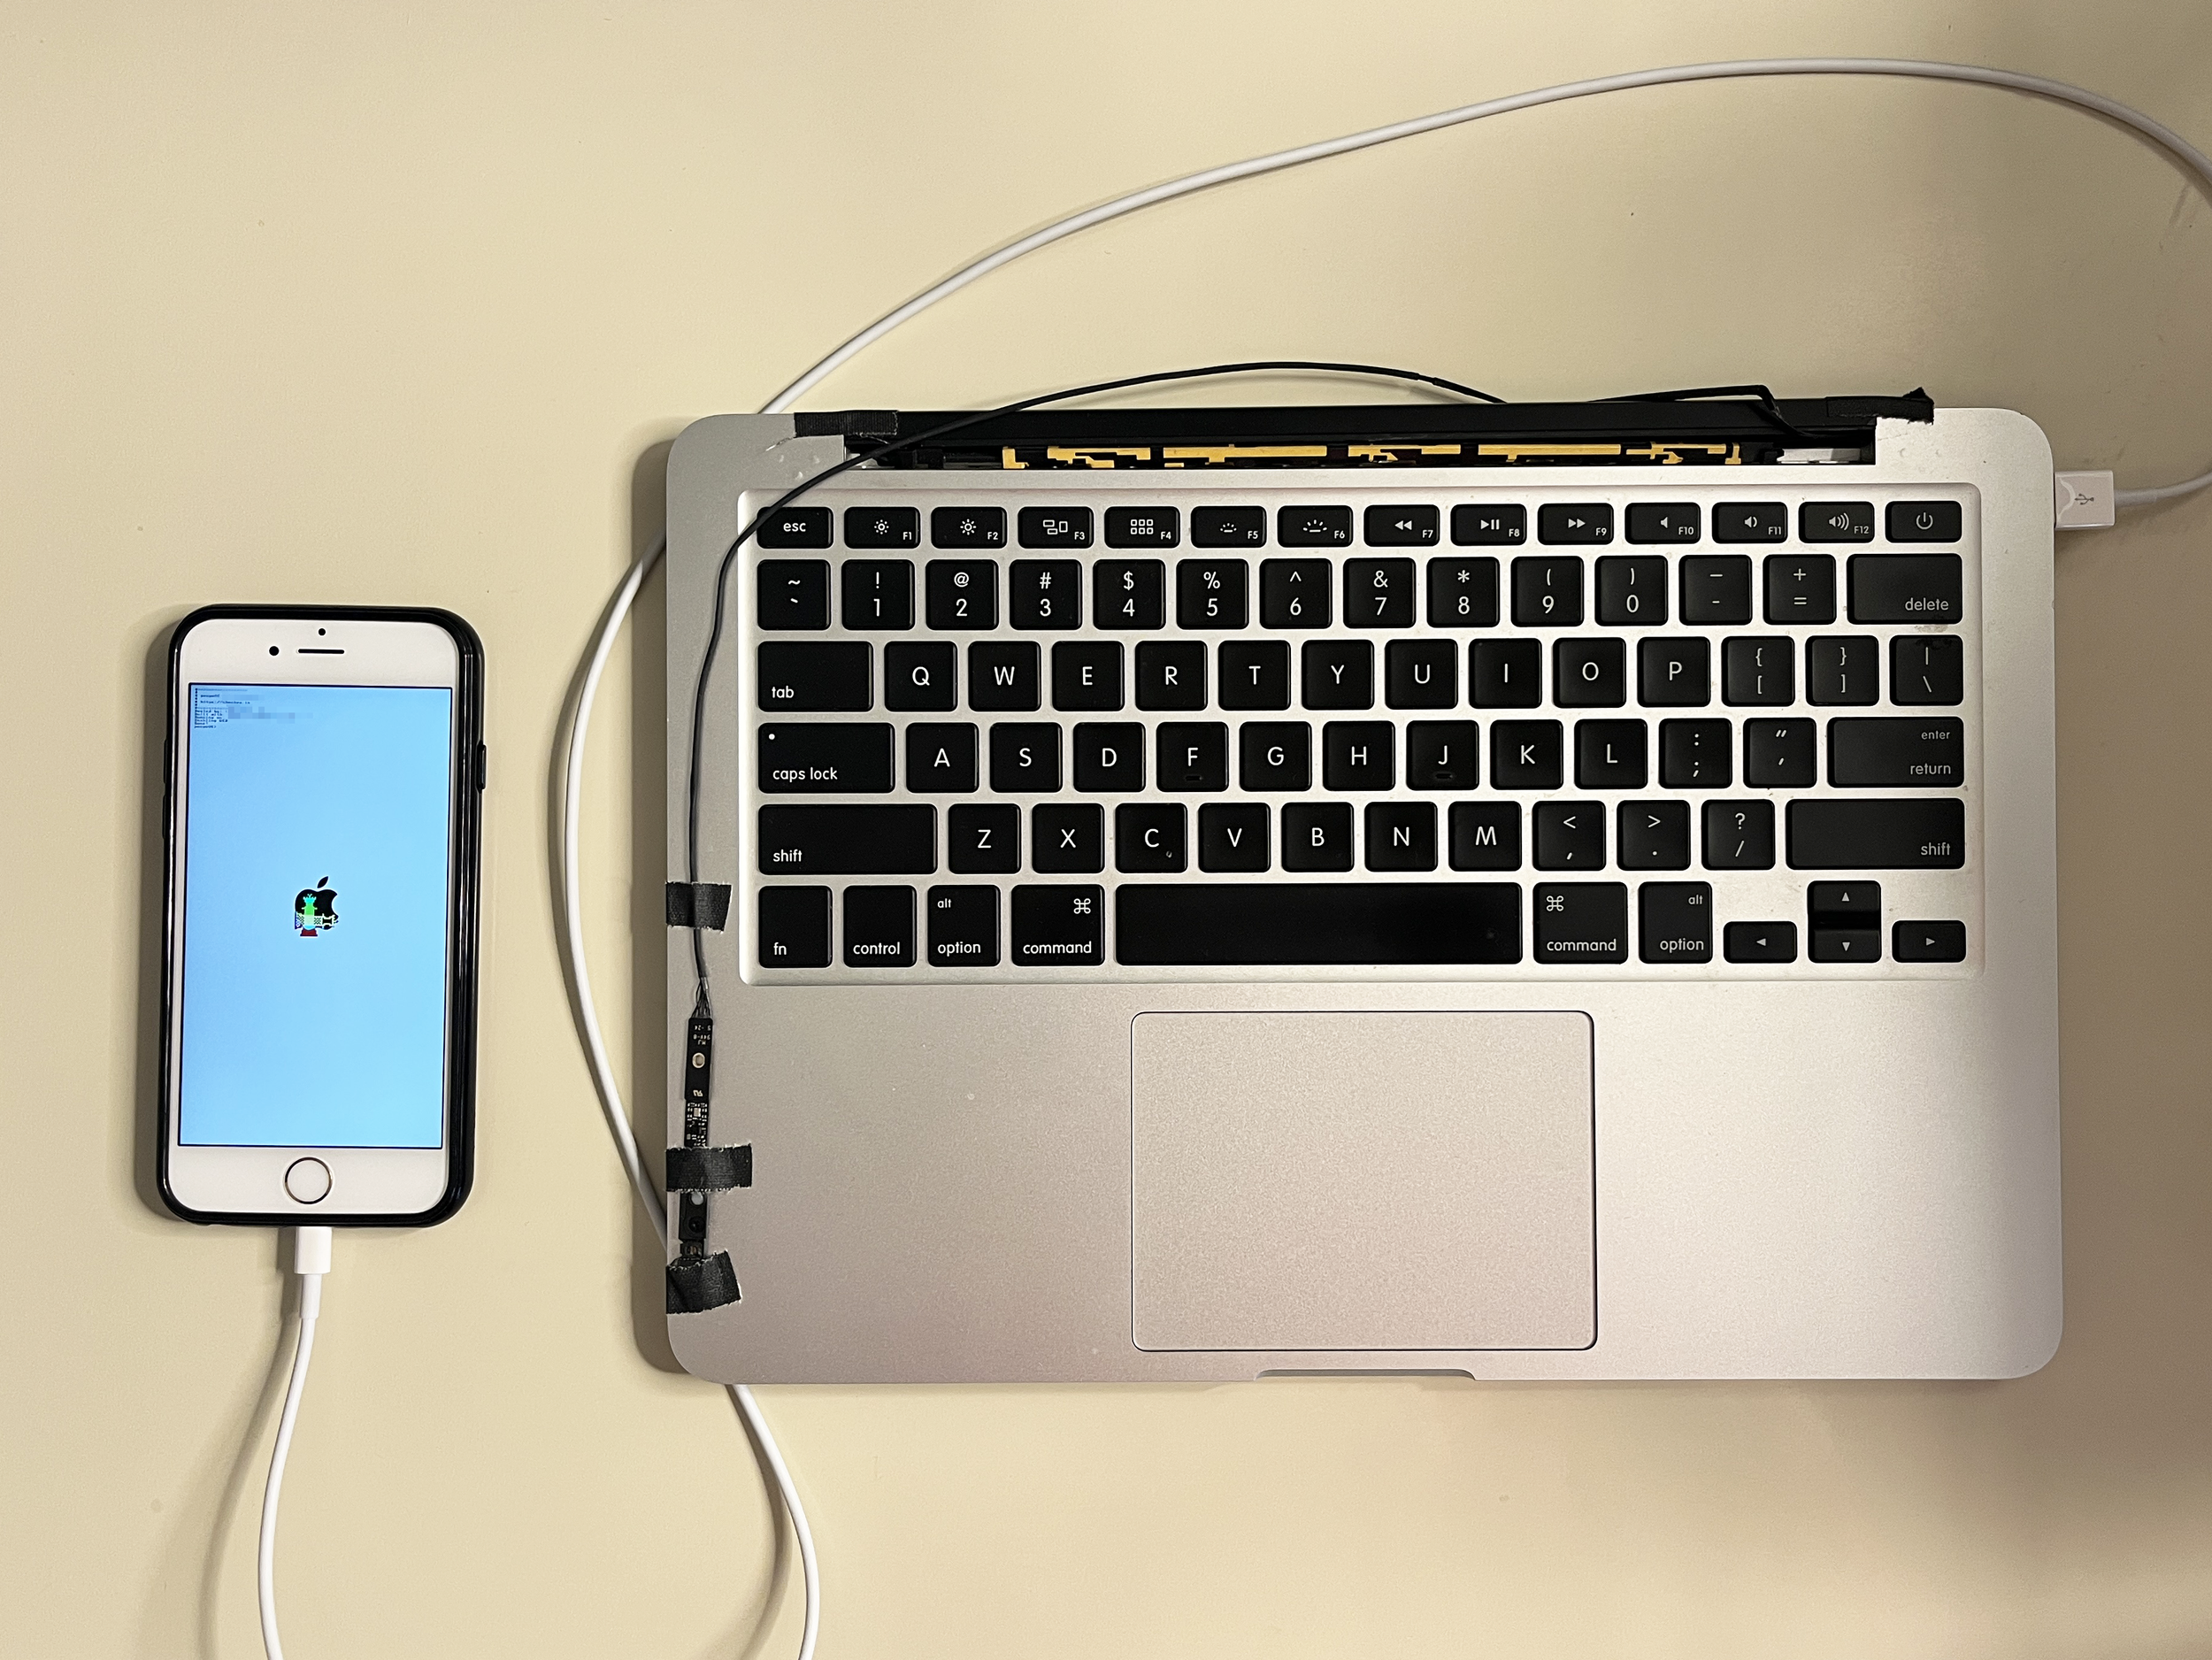
With your selected device, research the appropriate jailbreak exploit. The Apple Wiki is an excellent place to start. From there, read through the documentation of your chosen exploit. This can take some pretty specific criteria and troubleshooting of what simply happens to work. For my example, jailbreaking an iPhone 6s, iOS 15.8 took an afternoon of iterating through all combinations of physical MacBooks (VM would not work), USB-lighting cords, and the MacBook port connection until it worked. The final, successful setup:
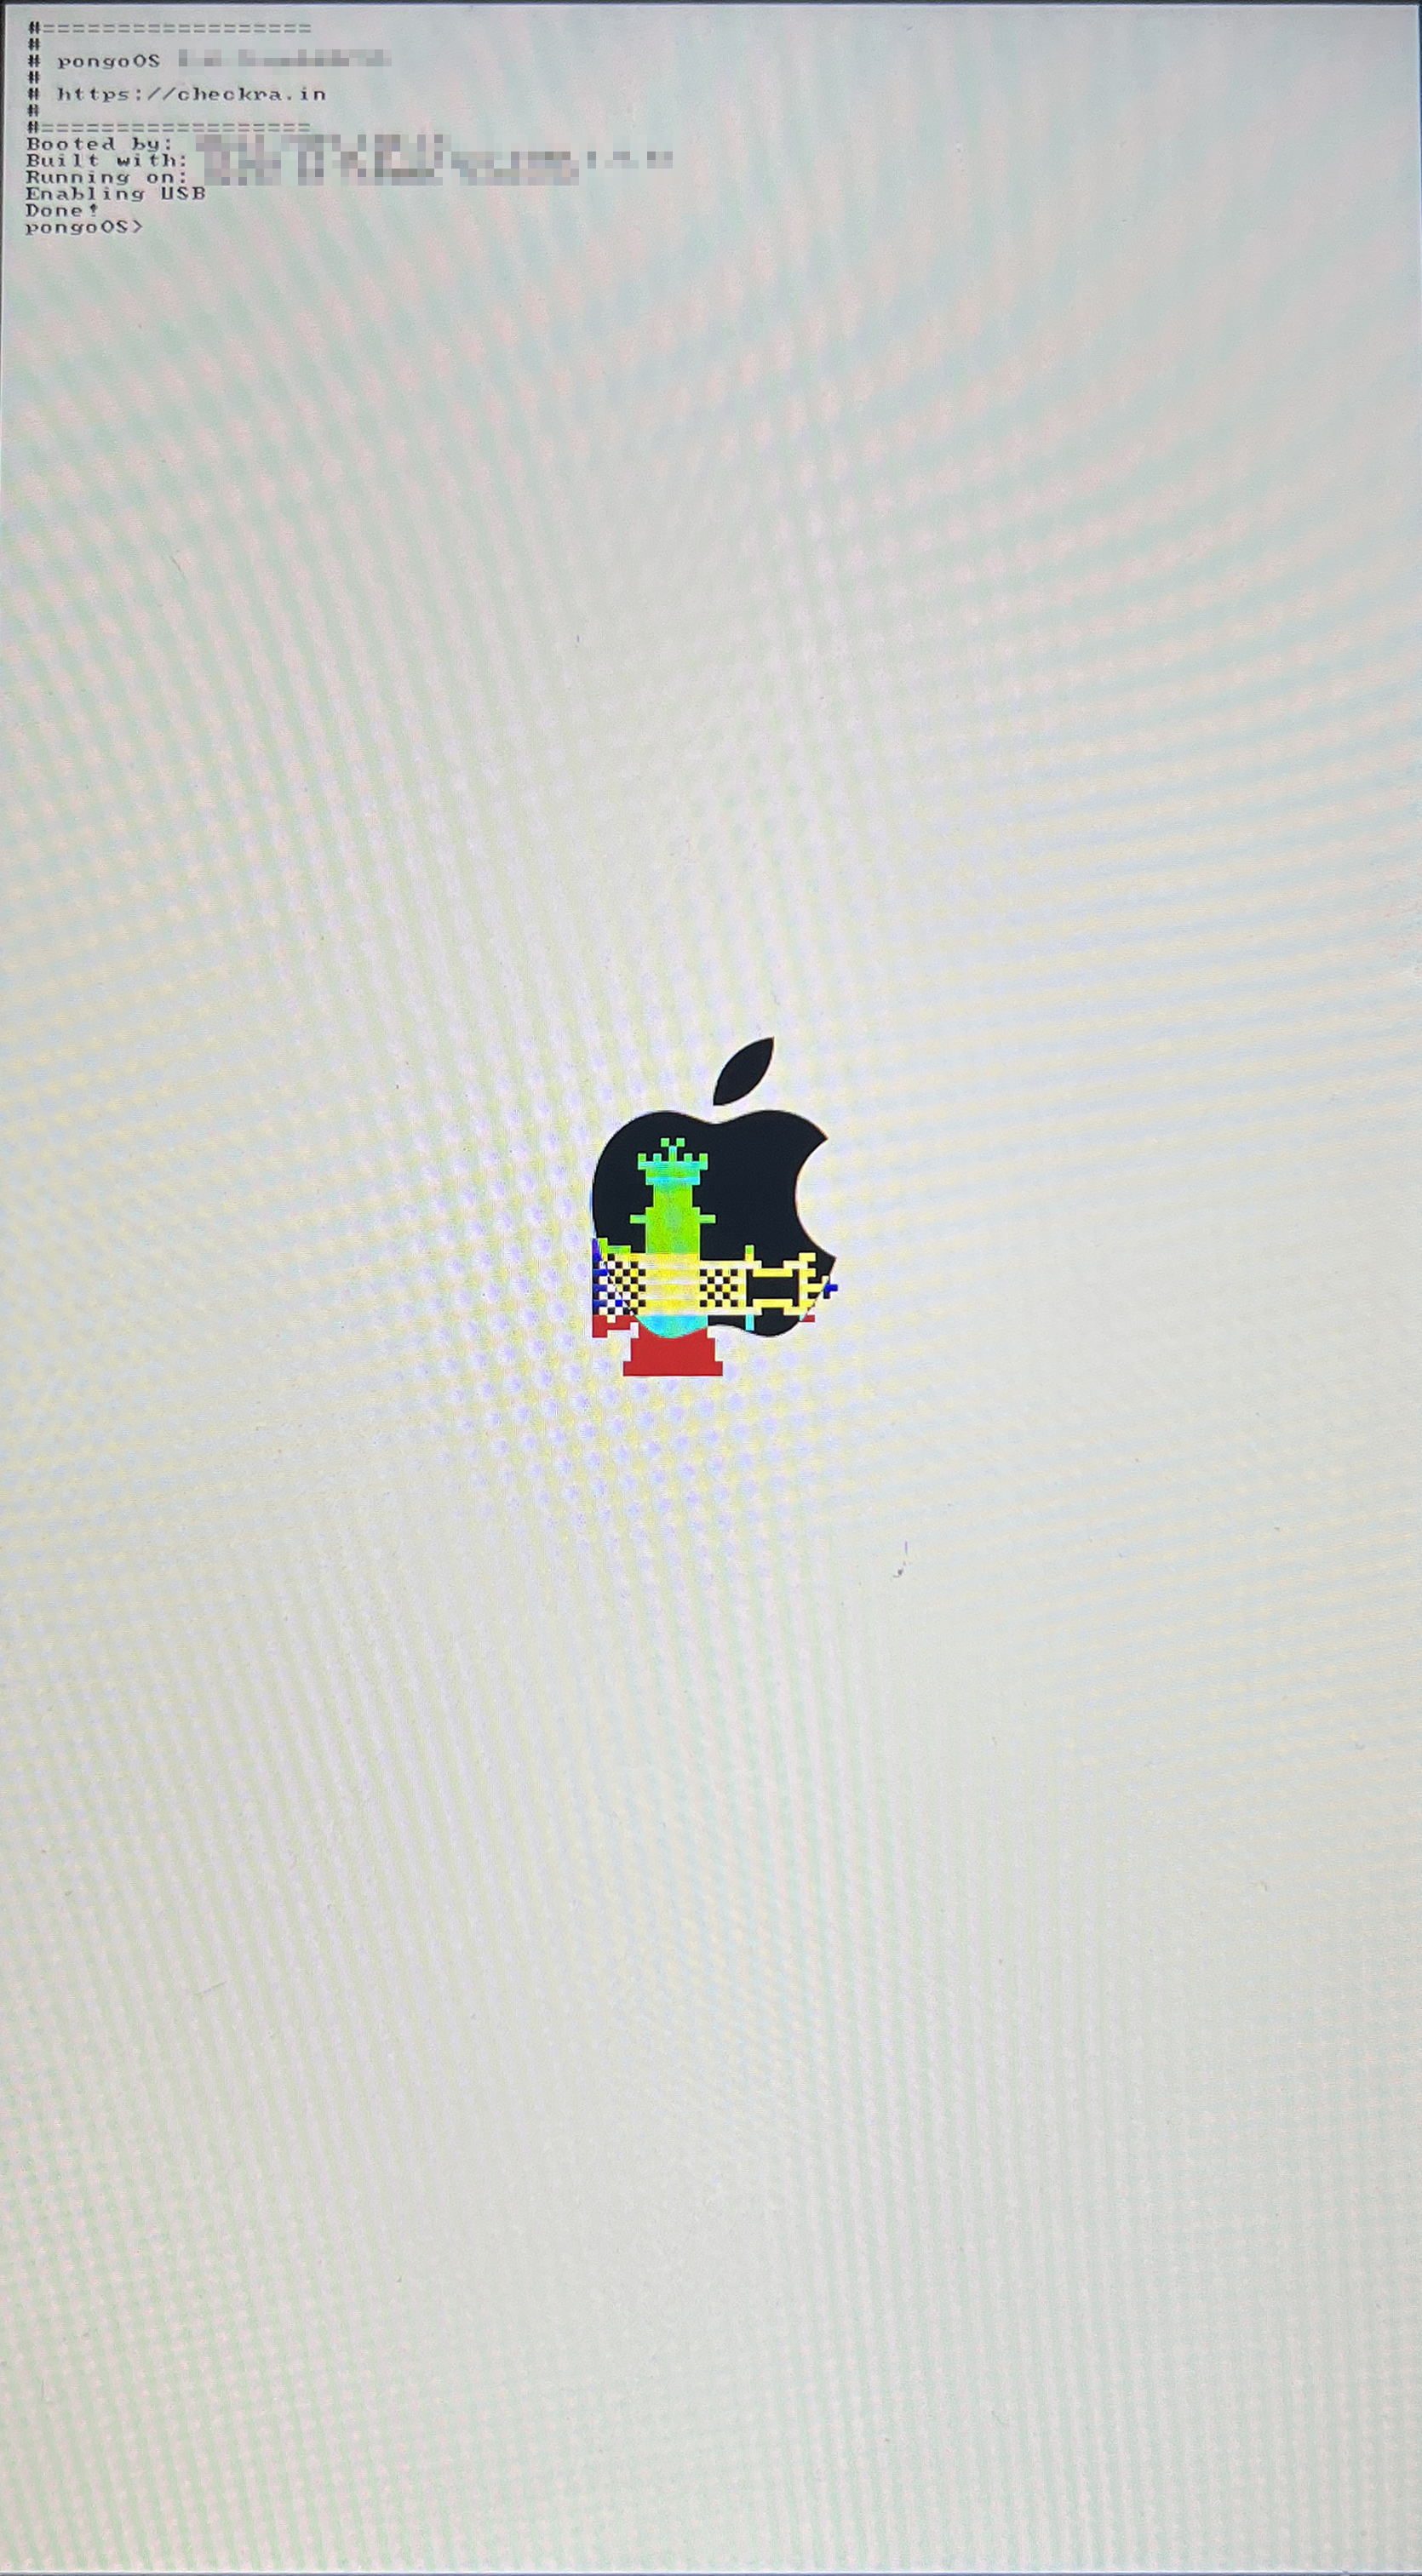
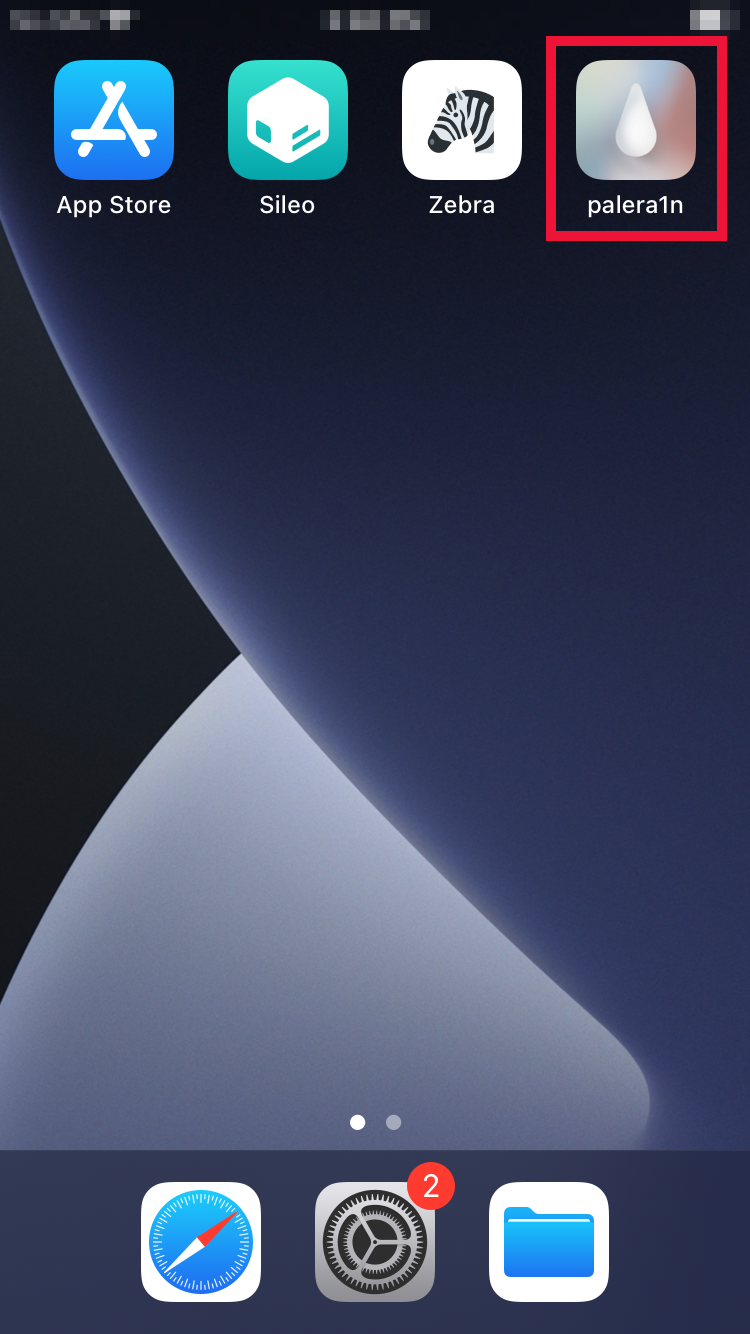
Once booted into the jailbroken mode, you should see a package manager icon (e.g. Cydia, Sileo, Zebra) displayed on the homepage. You might also see an icon tied to the jailbreak method.

2 ) Sideload the iOS App
To get the app, which isn’t available on the official App Store, we need to “sideload” it onto the iOS device.
2.1) Sign the App
Attention developers where this is part of your workflow — you can skip this step. iOS app signing is a security process where Apple verifies a developer's identity and ensures an app hasn't been tampered with. Unlike when downloading an app through the App Store, this won’t be handled automatically. We need to generate a certificate and sign the app with it. This requires an Apple Developer Account. Once signed up, create the certificate (see https://developer.apple.com/account/ios/certificate/).
To sign the app you can create a project in Xcode, include the application files, and use the Automatically manage signing feature after signing in (in Xcode) with your Apple ID (tied to your Apple Developer Account). Xcode handles the provisioning profile, certificate, and entitlements as part of the development process.
ASIDE: For those with specific security goals, a constrained budget, and enough time to trouble shoot: there are methods to spoof the signing process. AppSync Unified (iOS-device-side) and iOS App Signer (MacBook-side) are helpful tools to look into.
2.2) Connect the iOS device to the PC
We’re going to connect the iOS device to the PC over SSH. On the iOS device, open the package manager (Cydia, Sileo, Zebra, etc. depending on the jailbreak) and install OpenSSH. On the macOS device, we’ll install the libusbmuxd client library to get iproxy (easy to install with Homebrew).
Let’s connect. Physically connect your iOS device your PC with an appropriate data-transferring cable. On the PC open a terminal session and type:
$ iproxy 2222 22
This will create a local port "2222" that can be accessed over USB and will redirect to the port 44 that the iOS device has set up for SSH.
Open a second terminal session and connect to the iOS device over SSH. The default username and password (prompted) depend on the jailbreak type (look for documentation). The SSH command we’ll use:
$ ssh <default username>@127.0.0.1 -p 2222 -R 8080:127.0.0.1:8080

The “-R 8080:127.0.0.1:8080” portion of the SSH command is saying listen on port 8080 on the remote side (iOS device), and forward any connections hitting that remote port to 127.0.0.1:8080 on the local side (MacBook/PC). The iOS device’s localhost:8080 is now a tunnel to the PC’s localhost:8080. This will allow us to capture the iOS device’s web traffic (including the target apps’) through an SSH tunnel. We’ll configure the proxy settings on the iOS device and MacBook appropriately later.
2.3) Upload the IPA app over SSH
Install Filza on your iOS device through the jailbroken package manager. The Filza file manager will allow you to navigate the iOS device’s file system and install the application once uploaded.

Run the following command (keeping iproxy open) to upload your application file from the PC to the iOS device:
$ scp -P 2222 <path/to/ipa> <default username>@127.0.0.1:<destination/path/on/iOS device/>
Navigate to the IPA file in Filza, select it, and install. Once downloading completes, go to your homepage and give the new target app icon a tap.
3 ) Capture the Web Traffic
This step is applicable to any apps making web requests. We’re going to feed the iOS device’s web traffic (including the target app’s) through a forward proxy on our PC. Particularly, this setup goes through using PortSwigger’s Burp Suite Pro. Again, for those on a budget or needing the bare minimum features, PortSwigger also provides a free Burp Suite Community Edition.
3.1) Configure Burp Suite Pro
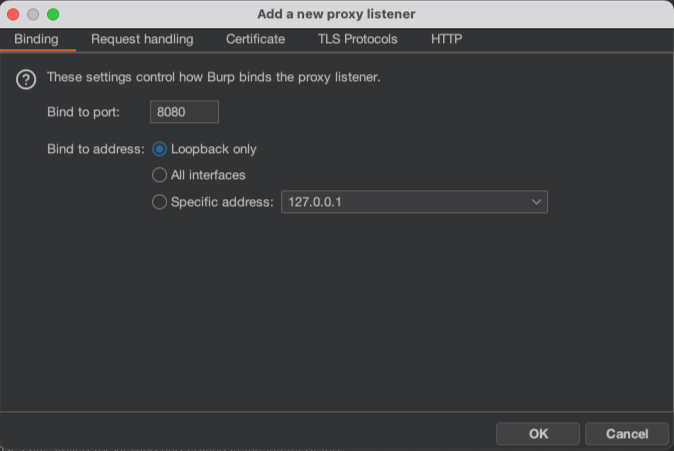
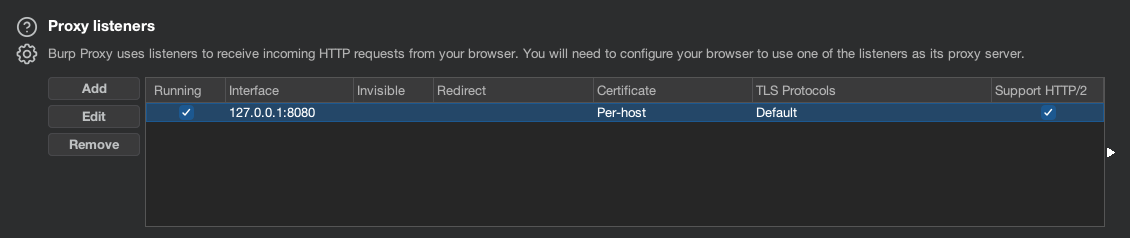
Open Burp Suite Professional and navigate to Proxy Settings (cogwheel) > Tools > Proxy.
Under Proxy listeners click “Add” and under Binding set Bind to Port to “8080” and Bind to address to the “Loopback only” option. Click OK.
3.2) Configure the iOS device
Keep in mind — the navigation through Settings will differ between iOS versions.
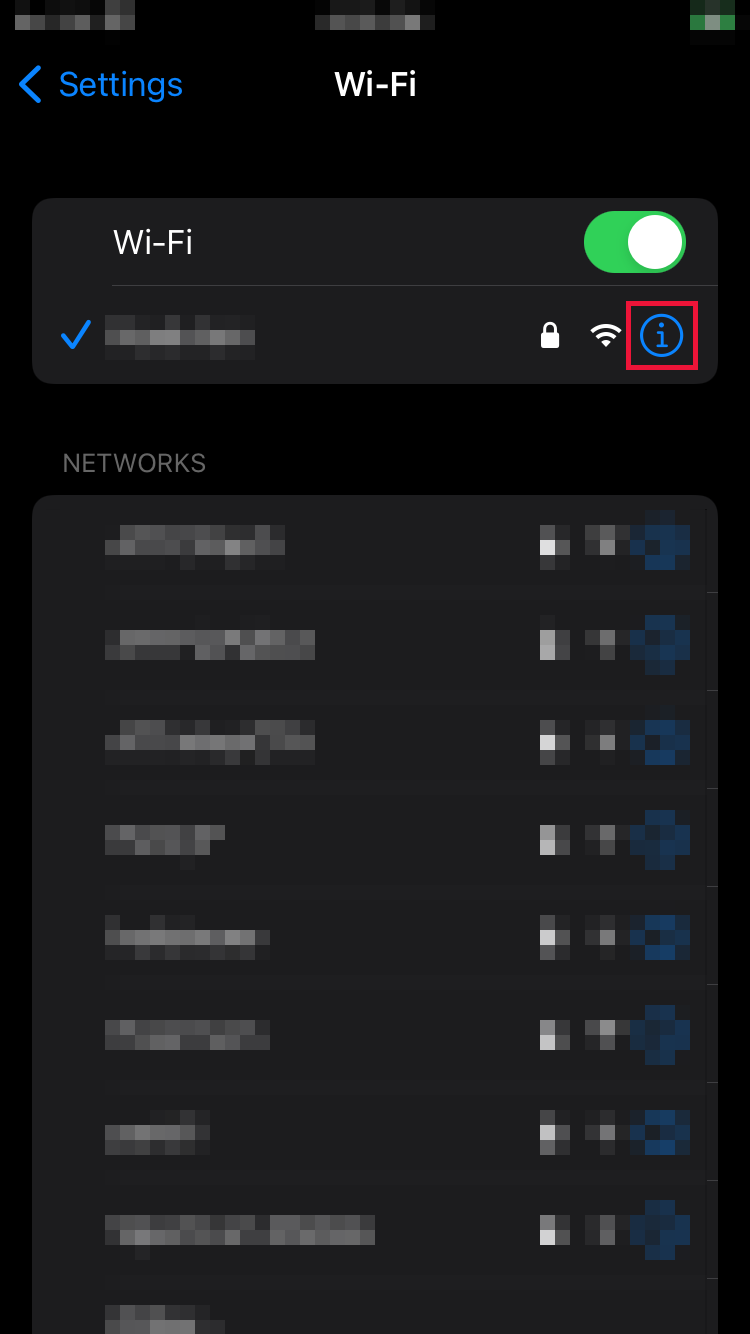
On the iOS device, navigate to Settings > Wi-Fi. Toggle on the Wi-Fi and connect to your Wi-Fi network. Click the information icon (i) to the right of the Wi-Fi network display.
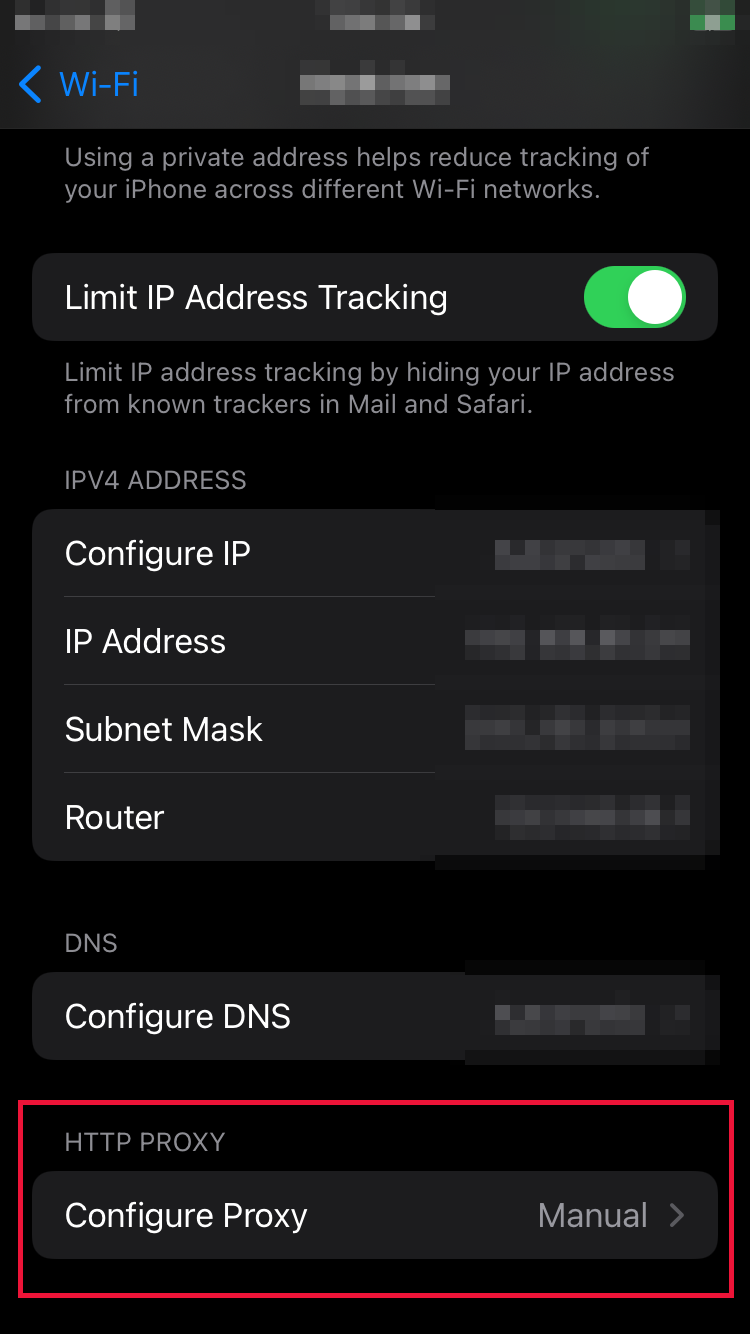
Navigate to Configure Proxy (likely at the bottom of the page). Select “Manual” and set Server to “localhost” and Port to “8080”.

The iOS device will now handle HTTP traffic through our SSH tunnel.
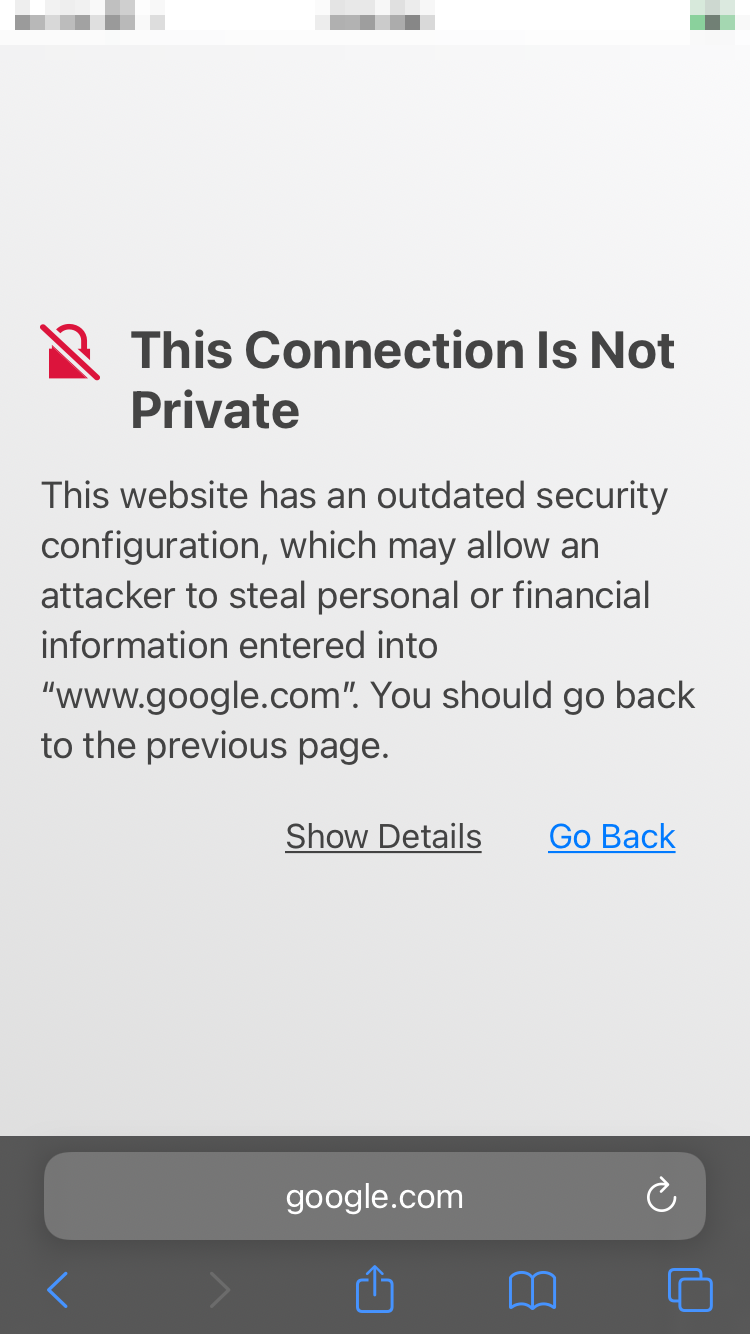
3.3) Install the CA Certificate
For the iOS to trust Burp Suite and be able to capture traffic, we need to install the Burp Suite Professional CA certificate and verify it in the iOS device Settings. Otherwise we’ll get the following message in your iOS device’s browser:
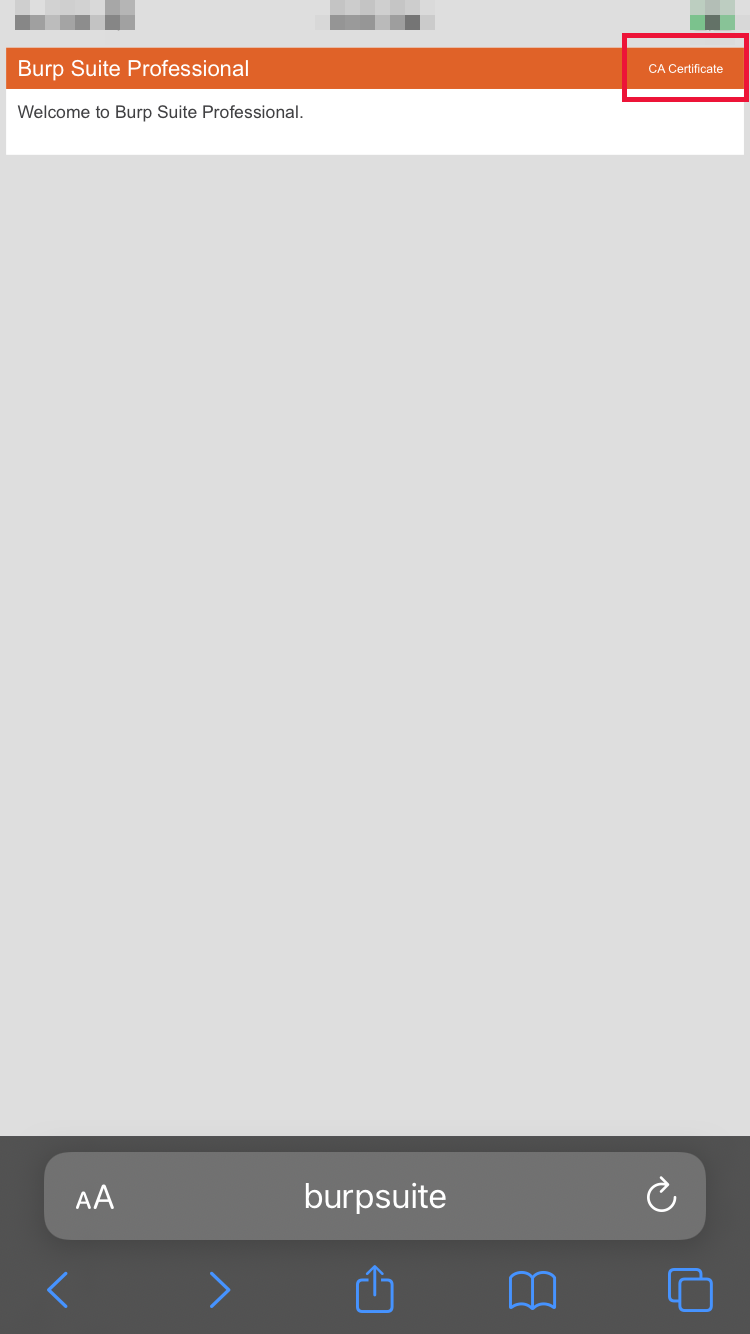
With the iOS device connected over our tailored SSH command and Burp Suite running, open the browser on the iOS device and go to “http://burpsuite”. You should see a webpage load with a “Burp Suite Professional” header. Once there, select “CA Certificate”.
NOTE: If the URL doesn’t resolve, the iOS device isn’t reaching Burp Suite (check your SSH command, iOS network settings, physical connectivity, and Burp Suite settings).
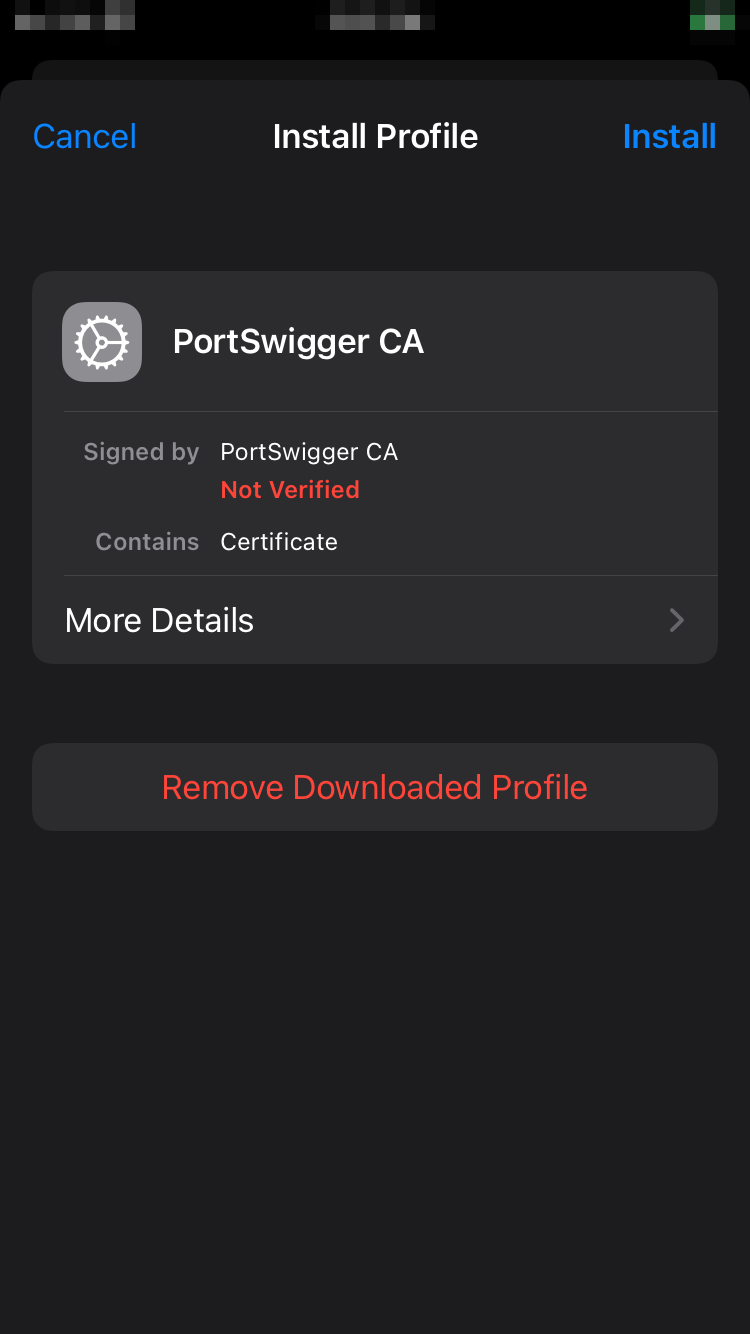
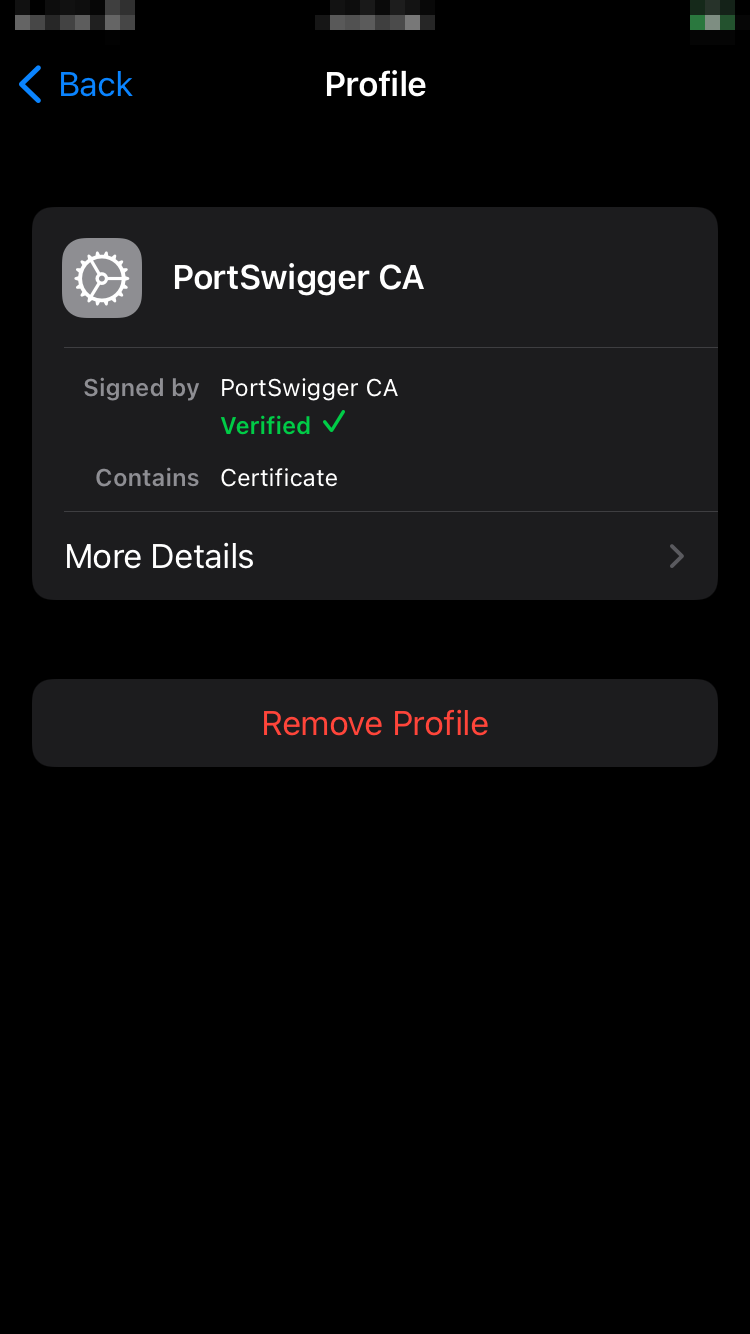
Once the CA Certificate downloads, navigate to Settings > Profile download > Install Profile and select “Install”.
Navigate to Settings > General > About > Certificate Trust Settings and toggle the switch to the right of “PortSwigger CA”. We’re enabling trust of this certificate.
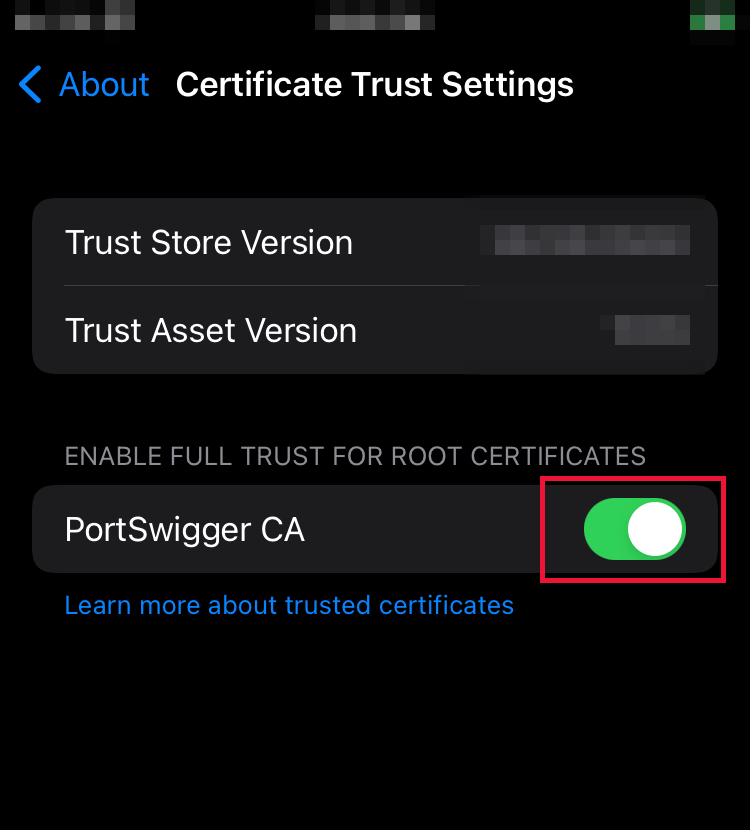
Now our iOS device will trust Burp Suite when feeding traffic through it.
3.4) Connect the iOS device to the PC
If not already, plug the iOS device into the MacBook/PC, start iproxy on the latter, and make an SSH connection with the same previous command:
$ ssh <default username>@127.0.0.1 -p 2222 -R 8080:127.0.0.1:8080
Once complete, look at Burp Suite’s captured traffic (Proxy > HTTP history) to start monitoring the web communication with your iPhone.

That’s a wrap. Poke around your target app and see what HTTP traffic you capture. Happy hacking.
*Legal / Ethical Disclosure — This post is provided for educational and defensive security purposes only. Perform testing only on devices, applications, and accounts you own or have explicit written permission to assess, and only within the agreed scope and applicable laws. Do not use these techniques to access, intercept, modify, or disrupt any third-party systems, networks, or data without authorization. You are solely responsible for ensuring compliance with local laws, platform terms (e.g., Apple’s), and any licensing or usage restrictions. The author assumes no liability for misuse, damage, data loss, service interruption, or legal consequences resulting from use of the information provided. Nothing here constitutes legal advice.